
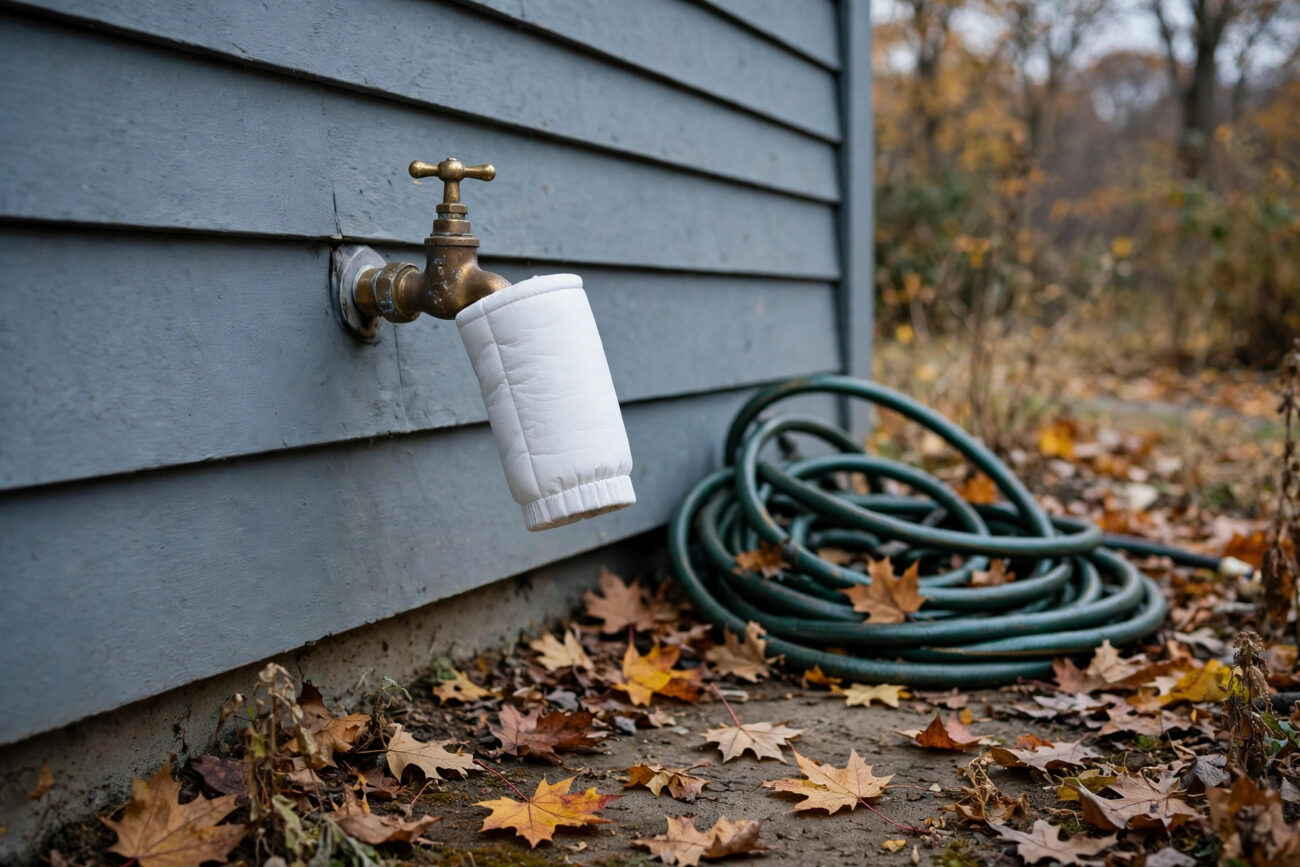
One cold night in late October can do more damage to your home than a whole winter of snow. Learning how to winterize outdoor faucets takes about 20 minutes, costs less than a family pizza, and can save you from a burst pipe repair bill that often runs into hundreds or even thousands of dollars. Water expands by about nine percent when it freezes, and that pressure is strong enough to split copper, crack a faucet body, and flood a basement wall before you ever notice a problem.
In this guide, you will learn exactly what winterizing means, how to tell which type of faucet you have, and the step-by-step process for standard and frost-free faucets. You will also see what supplies cost, the mistakes that cause most freeze damage, and answers to the questions homeowners ask most. If you can turn a valve and hold a bucket, you can do this job yourself.
What Is Winterizing an Outdoor Faucet?
Winterizing an outdoor faucet means removing the water from the faucet and the short run of pipe that feeds it, then protecting what is left from the cold. An outdoor faucet, also called a hose bib or sillcock, sits outside your heated walls. Unlike the pipes inside your home, it gets no warmth from your furnace, so trapped water inside it freezes fast.
When water freezes, it expands. In an open container, that expansion is harmless. Inside a closed pipe, the ice has nowhere to go, so pressure builds until something gives. The split often happens inside the wall, where you cannot see it. Many homeowners only discover the damage in spring, when they turn the faucet on and water pours into the basement or behind the siding.
Winterizing breaks that chain. By shutting off the water supply to the faucet, draining the line, and adding insulation, you leave nothing inside the pipe that can freeze and expand. It is a small seasonal chore, much like cleaning gutters or putting away patio furniture, and it belongs on every fall home maintenance list.
When Should You Winterize Outdoor Faucets?
Winterize before your area’s first hard freeze, which is a night when temperatures drop to 28 degrees Fahrenheit or lower for several hours. A light frost at 32 degrees rarely bursts a pipe, but one hard freeze is enough to split a faucet that still holds water.
Timing varies by region. In the northern United States, that usually means early to mid-October. In the Midwest and Northeast, late October to mid-November is typical. In the South, late November or December may be safe, but an early cold snap can still catch you off guard. The safest rule is simple: finish the job as soon as overnight lows start dipping into the 30s, and do not wait for a freeze warning.
If you are unsure of your local dates, your state extension service or the National Weather Service publishes average first-freeze dates for your area. Mark the date on your calendar each fall, and treat it like a deadline, not a suggestion.
Know Your Faucet Type Before You Start
Outdoor faucets come in two main types, and the steps differ slightly for each. Take a minute to identify yours before you touch a valve.
A standard hose bib is the older style. It has a short body, and the valve that stops the water sits right at the exterior wall. When you close it, water stays in the pipe all the way out to the siding, which is exactly where it freezes first. These faucets need the full treatment: an interior shutoff, draining, and insulation.
A frost-free sillcock, also called a frost-proof faucet, is the modern standard in most homes built in recent decades. Its stem is long, usually 8 to 14 inches, and the valve seat that actually stops the water sits deep inside the warm wall. When you close it, the outer section drains empty on its own. Frost-free faucets are easier to winterize, but they still fail if a hose is left attached, because a connected hose traps water in the exterior section and defeats the whole design.
How can you tell which one you have? Look at the handle. On a frost-free faucet, the handle sits noticeably farther from the wall, and the body is longer. On a standard hose bib, the handle sits close to the wall. If you are still unsure, check inside: a standard faucet usually has a dedicated shutoff valve on the pipe in the basement or crawl space near that wall.
| Faucet type | How to spot it | Winterizing effort | Biggest risk |
|---|---|---|---|
| Standard hose bib | Short body, handle close to the wall | Moderate: interior shutoff, draining, cover | Water trapped at the exterior wall freezes and splits the pipe |
| Frost-free sillcock | Long body, handle 8 to 14 inches from the wall | Easy: remove the hose, close the faucet | A hose left attached traps water and defeats the design |
| Yard hydrant | Standalone post in the yard, lever handle | Moderate: drain below the frost line | Lever left partly open lets water sit in the standpipe |
What You Will Need
Most of this job uses things you already own. Gather everything before you start so you are not running back inside with wet hands.
- Insulated faucet covers: foam domes or hard-shell covers, typically a few dollars each at any hardware store. Get one per outdoor faucet.
- A bucket or old towel: to catch the water that drains from the line.
- Adjustable wrench: for a stiff drain cap or a stuck hose fitting.
- Pipe insulation or heat tape (optional): useful for exposed pipes in unheated garages, crawl spaces, or on north-facing walls.
- Penetrating oil: if a shutoff valve has not been turned in years and feels stuck.
Total cost for a typical home with two faucets is usually under 15 dollars. Compare that with a burst pipe repair, which often costs 500 dollars or more once you count the plumber, the drywall, and the water damage cleanup.
How to Winterize Outdoor Faucets Step by Step
Follow these steps in order. The whole job takes about 10 minutes per faucet once you know where your valves are.
Step 1: Disconnect and Drain Every Hose
Walk the entire exterior of your house and disconnect every hose, from every faucet, including the one behind the garage that you always forget. Remove splitters, timers, and quick-connect fittings too. Anything threaded onto the faucet traps water and stops the faucet from draining.
Drain each hose by stretching it out on a slope or coiling it downhill so the water runs out. Then store hoses indoors or in a shed. A hose left outside full of water will split over the winter, and a frozen hose can back ice up into the faucet itself.
Step 2: Find and Close the Interior Shutoff Valve
Go inside and find the shutoff valve for the outdoor line. It is usually in the basement or crawl space, on the pipe heading toward the exterior wall near the faucet. Turn it clockwise until it stops. For a ball valve, the handle perpendicular to the pipe means off. For a gate valve, turn the wheel clockwise.
If the valve is stiff, do not force it. Spray a little penetrating oil on the stem, wait a few minutes, and try again. A valve that will not turn, or one that keeps dripping after you close it, is a sign to call a plumber before the freeze arrives.
If your home has no dedicated shutoff for the outdoor faucet, you cannot drain the line this way. In that case, rely on an insulated cover and consider having a plumber add a shutoff valve before next winter. It is a small job that pays for itself the first cold year.
Step 3: Open the Outdoor Faucet and Drain the Line
Go back outside and open the outdoor faucet all the way. A little water will run out, then it should stop. If water keeps flowing, the indoor valve is not holding, and you need to fix or replace it.
If the indoor valve has a small bleeder or drain cap on its side, open it with a bucket underneath. This lets the last of the water between the valve and the wall drain out. Close the cap again once the water stops dripping.
For a standard faucet, leave the outdoor faucet open all winter. That way, any water that finds its way into the pipe has somewhere to go, and any ice that forms has room to expand instead of splitting the pipe.
Step 4: Insulate the Outdoor Faucet
Fit an insulated cover over each outdoor faucet. Foam domes slip over the faucet and tighten with a drawstring or a loop, while hard-shell covers clip on and seal with a gasket. Either type works. Make sure the cover sits snug against the wall with no gaps.
A cover alone is not a substitute for draining, but it adds several degrees of protection on exposed or north-facing walls. For pipes in unheated spaces, wrap exposed sections with foam pipe insulation as well. If you have a faucet on a wall that gets no sun at all, this extra step is worth the few dollars it costs.
Step 5: Handle Frost-Free Faucets and Yard Hydrants
For a frost-free sillcock, the job is shorter: remove the hose, close the faucet as usual, and you are done. Do not leave the faucet open, and do not add a cover that traps moisture against the wall. The design drains itself, as long as the hose is off. Still, a cover does no harm in very cold climates, so many homeowners add one for peace of mind.
For a yard hydrant, lift the handle fully to open it, let the water drain back down below the frost line, then close it firmly. A handle left halfway lets water sit in the standpipe, where it can freeze and crack the hydrant. Check that the hydrant drains by listening for the faint gurgle of water dropping back down after you close it.
Costs of Winterizing Outdoor Faucets
Winterizing is one of the cheapest home maintenance jobs you can do. Here are typical price ranges in the United States. Prices vary by store and region, so treat these as ballpark figures.
- Foam faucet covers: typically 3 to 8 dollars each
- Hard-shell insulated covers: typically 8 to 15 dollars each
- Foam pipe insulation (6-foot length): typically 3 to 6 dollars
- Heat tape (per faucet run): typically 20 to 40 dollars
- Plumber visit to add a shutoff valve: typically 150 to 350 dollars
- Burst pipe repair, if you skip the job: typically 500 to 2,000 dollars or more
Most homeowners spend under 20 dollars and under half an hour for the whole house. That is a strong return for a job that protects your walls, your basement, and your water bill. For more on keeping your home running efficiently through the cold months, see our guide on how Piedmont Natural Gas is powering homes and businesses more efficiently.
Common Mistakes That Cause Freeze Damage
Most burst outdoor faucets are not caused by bad luck. They are caused by small, avoidable mistakes. Here are the ones plumbers see every spring.
- Leaving a hose attached. This is the number one cause. Even frost-free faucets burst when a hose traps water in the stem. Remove every hose, every time.
- Trusting a cover alone. A foam dome with a full pipe behind it is decoration, not protection. Drain first, then cover.
- Forgetting a faucet. Side yards, garage walls, and back patios hide faucets. Walk the full perimeter and count them before you start.
- Closing a standard faucet after draining. On a standard hose bib, the outdoor faucet should stay open all winter so trapped water can escape.
- Waiting for the forecast. Freeze warnings often arrive the same night the temperature drops. Winterize early, while the work is still pleasant.
- Using too much air pressure to blow out a line. If you use an air compressor, keep the pressure low and only on an isolated branch after the shutoff is closed. High pressure can damage old valves and fittings.
What to Do If a Pipe Already Froze
If you turn on a tap and get only a trickle or nothing at all, a pipe may have frozen. Leave the tap open, because running water helps melt ice and gives the pipe room as it thaws. Never use an open flame to thaw a pipe. A hair dryer, a heating pad, or warm towels are safer choices, and you should only thaw a pipe you can see and reach.
If you cannot find the frozen section, if the pipe has already split, or if water is leaking anywhere, shut off your main water supply and call a plumber. Quick action limits the water damage, which is usually the most expensive part of a burst pipe.
Frequently Asked Questions
When should I winterize my outdoor faucets?
Winterize before the first hard freeze in your area, which is a night at 28 degrees Fahrenheit or lower for several hours. In the northern United States that is usually early to mid-October, in the Midwest and Northeast late October to mid-November, and in the South late November or December. Do the job as soon as overnight lows start dipping into the 30s.
Do frost-free faucets need to be winterized?
Yes, but the job is simpler. A frost-free faucet drains itself as long as the hose is removed. The single most important step is taking the hose off. A connected hose traps water in the exterior section and defeats the design, which is how most frost-free faucets burst.
Should I leave my outdoor faucet open or closed in winter?
It depends on the type. Leave a standard hose bib open all winter after you close the interior shutoff and drain the line. Close a frost-free sillcock as usual after removing the hose. If you are unsure which type you have, check the handle distance from the wall or look for an interior shutoff valve.
Is a faucet cover enough to prevent freezing?
No, a cover alone is not enough. An insulated cover slows heat loss and adds a few degrees of protection, but it cannot stop water trapped inside a full pipe from freezing. Always drain the line first, then add the cover as a second layer of protection.
What if I cannot find an interior shutoff valve?
Some older homes have no dedicated shutoff for the outdoor faucet. In that case, fit an insulated cover and drain what you can from the outside, then have a plumber install a shutoff valve before the next winter. It is a modest one-time job that makes every future fall much easier.
At what temperature do outdoor faucets freeze?
Outdoor faucets can freeze on the first night temperatures drop into the mid-20s Fahrenheit, even while indoor pipes are fine, because the faucet sits outside the heated wall with no insulation. Water in an exposed pipe can freeze after several hours at 28 degrees or lower, which is why timing your winterizing around the first hard freeze matters so much.
Related Reading
- How Piedmont Natural Gas Is Powering Homes and Businesses More Efficiently
- Liberty High School Gas Evacuation Sparks Safety Concerns Among Parents
Conclusion
Winterizing your outdoor faucets is a short, cheap job that prevents one of the most common and costly cold-weather home repairs. Disconnect the hoses, close the interior shutoff, drain the line, leave a standard faucet open, and add a cover. Do it before the first hard freeze, and do it every fall. Your pipes, your basement, and your spring self will thank you. For timing guidance by state, see the Farmers’ Almanac guide to when to winterize sprinklers and outdoor faucets.
