
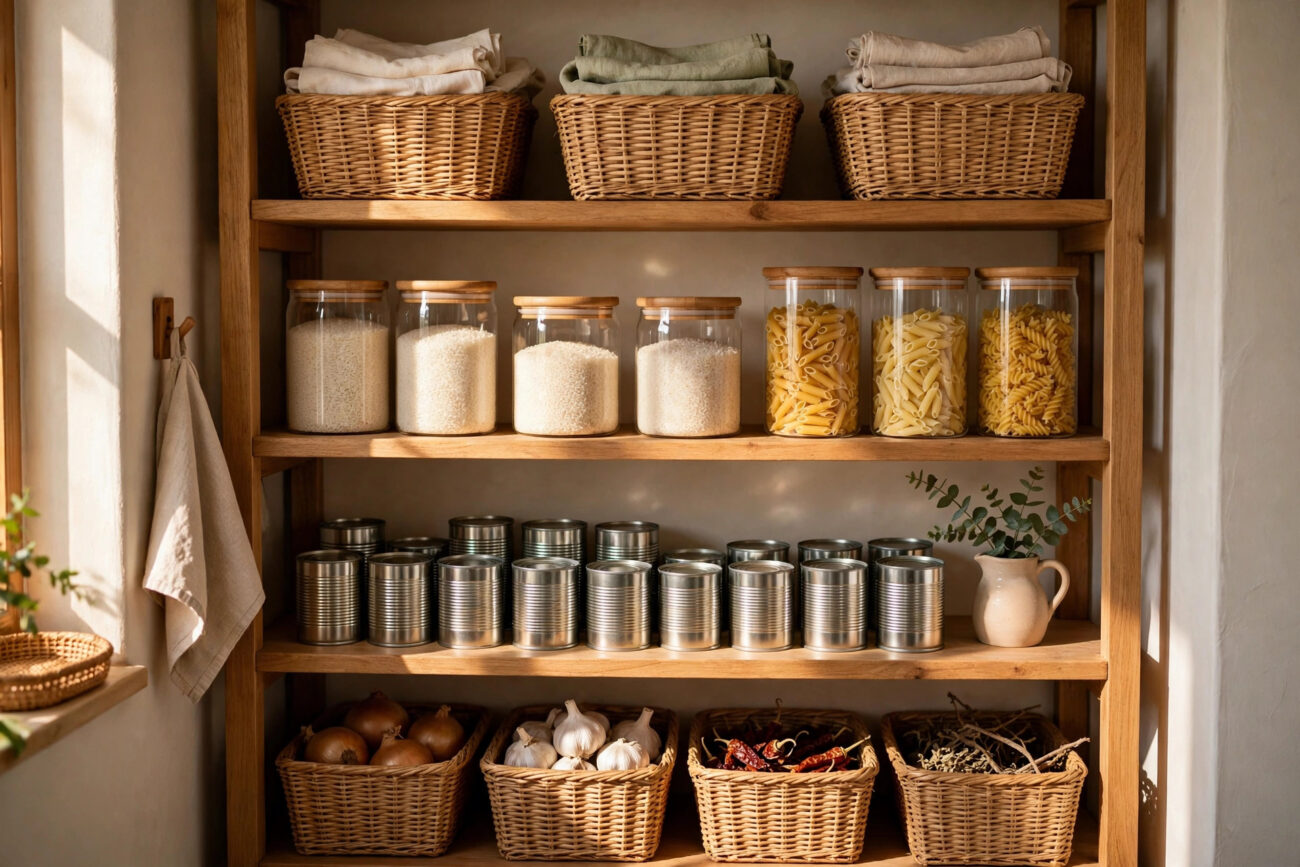
A small pantry can feel like a losing battle. You buy groceries, shove them onto a shelf, and a week later you are buying a second jar of pasta sauce because the first one is buried behind the cereal. Learning how to organize a small pantry on a budget fixes that without a walk-in room or a big shopping trip. Most of the work is free: empty the shelves, measure the space, group food by how you actually use it, and give every shelf one job.
In this guide, you will get a step-by-step method that works for a single cabinet, a narrow closet, or a shelf you have claimed for food. You will see three budget tiers, a shelf-by-shelf zone map, which dollar-store organizers are worth buying and which to skip, and the simple habits that keep the pantry tidy after the reset. A full reset for a typical small pantry costs about 25 dollars, and you can finish it in one afternoon.
What Counts as a Small Pantry?
When we say small pantry, we mean a space with a footprint of roughly 2 feet by 2 feet or less. That could be a single tall kitchen cabinet, 18 to 24 inches wide, a narrow reach-in closet, or a freestanding shelf unit in a kitchen with no built-in pantry at all. The advice in this guide is written for that scale, not for a walk-in room.
Small pantries punish wrong guesses. A bin that is two inches too wide is not almost fine. It is a bin that does not fit, and it goes back to the store, or worse, stays in a bag by the door for six months. That is why the first step is always measuring, not shopping. You need four numbers for each shelf: width, depth, the height from the shelf to the shelf above it, and the clearance when the door closes.
The other thing to know is that a small pantry is not a storage problem, it is a visibility problem. When you cannot see what you own, you buy duplicates, food expires at the back, and cooking takes longer because every meal starts with a search. Organization pays for itself in fewer wasted groceries, which matters more than matching containers ever will.
How to Organize a Small Pantry on a Budget: The 8-Step Method
Work through these steps in order. Skipping ahead to the buying stage is the single most common way people overspend, because you end up with organizers for problems you do not actually have.
Step 1: Empty the Pantry Completely
Set aside 45 minutes and pull everything out onto the kitchen table or the counter. Do not leave a single spice jar behind. Wipe the bare shelves with warm water and mild dish soap. A clean, empty shelf resets your head as much as your pantry, and it lets you see stains, crumbs, and shelf damage you would otherwise miss.
Step 2: Measure the Shelves, Not the Room
Grab a tape measure and write down the width, depth, and shelf-to-shelf height for every shelf. Note anything that limits the space: a door that does not open fully, a pipe, a light fixture, or a shelf that cannot move. Bring these numbers with you if you shop, and measure twice before buying any bin. Most shelves in small cabinets leave a gap of 4 to 8 inches above the tallest item, which is dead space a riser can turn into a second level.
Step 3: Check Dates and Edit Ruthlessly
Sort everything into four piles and set a timer for 30 minutes so the job does not drag.
- Keep and use weekly: your real, regular foods, the things you reach for every week.
- Keep but rarely use: baking supplies, special-occasion items, and backup stock.
- Donate: unopened, in-date items your family is not going to eat. A local food pantry will gladly take them.
- Toss: stale, moldy, smelly, bug-bitten, or open and forgotten food. Spices that have lost their smell have lost their flavor too.
Expect a fair share of a small pantry to land in the donate and toss piles. That is normal, and it is the point. You cannot organize clutter, you can only rearrange it. Best-by dates are mostly about quality, so check use-by dates and look at the food itself. Infant formula is the exception: never use it past its use-by date.
Step 4: Group Food by Use, Not by Type
Group what is left by how you actually cook, not by package shape. Practical categories include breakfast, grains and pasta, cans and jars, baking, snacks, spices, and drinks. A bag of rice and a box of pasta belong together because they anchor the same dinners, even though their boxes look nothing alike.
If you cook for kids, make a snack category they can reach on their own. If you bake once a month, baking supplies can share a high shelf as one group instead of spreading across three. The test is simple: when you stand in front of the pantry thinking about dinner, can you find everything for that meal in one or two spots?
Step 5: Assign Zones by Height and Weight
Give every shelf one job, based on how often you reach for things and how heavy they are.
| Shelf | What goes there | Why it works |
|---|---|---|
| Top shelf | Backup stock and rarely used items | Out of the way, still visible, light enough to lift down |
| Eye-level shelves | Daily food: breakfast, grains, snacks, cooking oils | You see it without bending or stretching, so nothing hides |
| Bottom shelf | Heavy items: big bags of rice, flour, oil, canned goods | Low center of gravity, no lifting overhead, easy to slide out |
| Door or side wall | Spices, small packets, wraps, measuring tools | Uses dead space and keeps small things from getting lost |
Put the heaviest things low, the everyday things at eye level, and the light backups up high. On deep shelves, put the taller items at the back and the shorter ones at the front so labels stay visible. On a cabinet door, use a rack or removable hooks only if the door still closes fully.
Step 6: Buy Only the Organizers That Fix a Named Problem
Now, and only now, buy organizers, and only for a problem you can name. A riser fixes the dead air above short cans. A bin fixes a deep shelf where things slide to the back. A turntable fixes a corner where bottles disappear. If you cannot name the problem, you do not need the product yet.
Good budget buys include shelf risers, which create a second level on a shelf and typically cost 8 to 20 dollars each, and a turntable or lazy Susan for deep shelves, typically 8 to 15 dollars. Bins turn a deep shelf into a pull-out drawer, and shoeboxes, sturdy delivery boxes, or dollar-store bins work just as well as expensive ones, typically 0 to 8 dollars per bin. Undershelf wire baskets slide onto existing shelves and create a second slot for shallow items like tortillas or snack bags, usually under 10 dollars.
Use what you already own first. Clean glass jars from pasta sauce make good canisters once you wash them. A small tension rod under a shelf can hang spray bottles or measuring cups. A cardboard tray cut from a delivery box corrals packets as well as a bought tray does.
Step 7: Decide Whether to Decant
Decanting means moving food out of its box or bag into a container. In a small pantry, decant selectively. Move open dry goods like rice, flour, oats, sugar, and pasta into airtight containers, because they stay fresh longer and stack neatly. Leave sturdy boxes and cans in their original packaging, because decanting them adds work without adding space.
Clear containers help you see at a glance what is running low, but matching sets are a luxury, not a requirement. Mixed jars with simple labels work just as well. If you do buy containers, start with four: one each for rice, pasta, flour, and oats, and add more only when a specific food keeps spilling or going stale.
Step 8: Label Everything, Then Keep a Simple Routine
Labels are the cheapest habit that keeps a pantry tidy. A strip of masking tape and a marker beats a fancy label maker for daily use. Mark every basket and jar with what sits inside it, and add the date you opened a bag or box if it matters.
Keeping it tidy takes about five minutes a week. Before you shop, open the pantry and look at each shelf for one minute. Pull forward anything that has drifted to the back, check for one item that is running low, and write it on the shopping list. Once a month, do a ten-minute check for expired items and anything that has been open too long. Small, regular resets beat one big annual cleanout every time.
Set the Budget First: Three Tiers That Work
Pick a tier before you shop, and stick to it. The tiers below cover a typical small pantry with three shelves. Prices vary by store, so check your local prices before you buy.
- The 10-dollar tier: masking tape and a marker for labels, two dollar-store bins, and one tension rod or a cardboard tray. This tier fixes visibility and grouping, which are the two biggest wins, and it spends nothing on containers.
- The 25-dollar tier: everything in the 10-dollar tier, plus two small baskets, four glass jars with lids, and one shelf riser. This is the full reset for most small pantries, and the riser alone often doubles the usable can space on one shelf.
- The 40-dollar tier: everything in the 25-dollar tier, plus a turntable for a deep shelf and one or two undershelf baskets. Choose this tier only if you have a deep corner or a tall shelf gap that the cheaper tiers cannot fix.
If 25 dollars still feels like a lot this month, buy in stages. Start with labels and one basket. Labels cost about two dollars, and one basket holds the worst pile in your pantry. Add the riser next month. A pantry organized in stages stays organized, because each piece solves a problem you have already felt.
Costs of a Small Pantry Reset
Here is a worked example for a typical small pantry with three shelves, using discount-store prices. Treat these as ballpark figures.
- 2 small baskets: typically 8 dollars, for snacks and packets
- 4 glass jars with lids: typically 6 dollars, for rice, pasta, and oats
- 1 shelf riser: typically 5 dollars, adds a second layer for cans
- 1 turntable: typically 8 dollars, for deep shelves or corners
- Labels and masking tape: typically 2 dollars
- Total for a full reset: about 25 to 30 dollars
The zero-dollar version is real too. Empty the shelves, sort the food, measure the space, group items by how you use them, and place them by weight and frequency. That alone fixes most small pantries, and it costs nothing but an afternoon. For more ideas on keeping your home running well on a budget, see our guide on how Piedmont Natural Gas is powering homes and businesses more efficiently.
Setup Tips by Pantry Type
Different small pantries need slightly different tricks. Match the fix to the shape you have.
- Cabinet pantry: use risers and small bins, keep daily food at eye level, and add a door rack for spices if the door still closes. Measure the door clearance before buying anything that hangs on it.
- Closet pantry: treat each shelf as a zone and use a turntable on deep shelves. Add a battery light if the closet is dark, since you cannot organize what you cannot see.
- No pantry at all: claim one dedicated cabinet, or use a rolling cart with a lidded bin. A cart can roll out of the way and gives you a pantry where the kitchen layout gave you none.
- Renter-friendly: everything in this guide works without drilling. Use removable hooks, tension rods, and freestanding bins, and take them with you when you move.
Five Mistakes That Waste Pantry Space
- Buying organizers before decluttering. Buying bins before you purge just organizes clutter. Empty and edit first, then buy for the problems that remain.
- Over-buying organizers. People come home with twenty organizer pieces and end up using three. Over-buying is itself a budget failure, because the money came out of the same envelope as groceries.
- Decanting everything. Moving every box into a container looks tidy in a photo, but it takes hours and wastes space on foods that were fine in their boxes. Decant open dry goods only.
- Ignoring the door and the vertical gaps. The back of the door and the 4 to 8 inches of air above short items are free space. A door rack and one riser often add more room than a new shelf would.
- No labels, no routine. A pantry without labels drifts back to chaos in a month, because nobody else in the house knows where things belong. Label it, and spend one minute per shelf before each shopping trip.
Frequently Asked Questions
What is the cheapest way to organize a small pantry?
Spend nothing on the first pass. Empty every shelf, measure the space, group food by how you actually use it, and place items by weight and frequency. Only then buy one or two organizers for the specific problem you cannot fix with free containers, labels, and a cardboard tray.
Where do I start organizing a small pantry on a budget?
Start by emptying it completely and wiping the shelves, then measure every shelf and sort food into keep, use soon, donate, and toss piles. Group what is left by use, assign each shelf one job, and only then buy organizers. Starting with shopping is the most common way to overspend.
How can I organize a pantry if I have no pantry at all?
Claim one dedicated cabinet for food, or use a rolling cart with a lidded bin. The same rules apply: group food by use, keep daily items at eye level, put heavy items low, and label everything. A cart works well in small kitchens because it can roll out of the way when you need the floor space.
Should I decant everything into matching containers?
No. Decant open dry goods like rice, flour, oats, and pasta into airtight containers, and leave sturdy boxes and cans in their packaging. Matching sets look nice, but mixed jars with simple labels work just as well, and decanting everything costs time and money without adding space.
How do I organize a small pantry in a rental?
Use renter-friendly fixes only: freestanding bins, shelf risers, turntables, tension rods, and removable hooks. Nothing in this guide needs drilling, and every organizer can move with you. Check that door racks and hooks still let the door close fully before you commit to them.
How do I keep a small pantry organized after the reset?
Spend one minute per shelf before each shopping trip: pull forward anything that drifted to the back, check what is running low, and add it to the list. Once a month, do a ten-minute check for expired items. Labels are what make the routine stick, because everyone in the house can see where things belong.
Related Reading
- How Piedmont Natural Gas Is Powering Homes and Businesses More Efficiently
- Popular Nail Shapes and What They Say About Your Style
Conclusion
Organizing a small pantry on a budget is not about buying matching containers. It is about creating visibility so you buy less, waste less, and cook faster. Empty the shelves, measure, edit honestly, group food by use, give each shelf one job, and buy only the organizers that fix a named problem. A full reset costs about 25 dollars and one afternoon, and the weekly one-minute check keeps it that way. For research-based advice on home food storage, see the step-by-step small pantry organization guide and the food storage guidance from the National Center for Home Food Preservation.
